Storing secrets in Azure Key Vault from Azure DevOps Release Pipeline
July 9, 2020
Azure Key Vault is a service that you can use to store application secrets and keys. You can store tokens, connection strings, certificates, API keys etc. in a Key Vault, and it provides a secured location with all usual safegaurds (encryption, access control etc.) that you would expect from such a solution. You would also expect that such solution should be easy to integrate with your build/release pipelines. Azure Key Vault turns out to be an obvious option if Azure happens to be your platform of choice.
Let’s say you deploy an Azure Service Bus using a template and want to store the details to access that resource securely in an Azure Key Vault.
Below I will show an example which illustrates a very simple technique to achieve this. This approach can be applied to any Azure resource that requires secure access credentials.
This technique can be particularly useful during the development, as you design and evolve your system and possibly destroy and re-create resources a few times. Every time that happens, you want to store the connection information in Key Vault so that later stages of pipeline can get the correct keys generated in the earlier stages of the pipeline.
Note: I am using the classic version of Azure DevOps Release pipelines for this post. You can read more about feature comparison of the classic and the new YAML based pipelines here.
We start with a simple release pipeline with a single stage which looks like this:
It simply deploys a template to create a Service Bus. You can find the complete template here. The output section of the template.json looks like this:
"outputs": {
  "NamespaceConnectionString": {
    "type": "string",
    "value": "[listkeys(variables('authRuleResourceId'), variables('sbVersion')).primaryConnectionString]"
  },
  "SharedAccessPolicyPrimaryKey": {
    "type": "string",
    "value": "[listkeys(variables('authRuleResourceId'), variables('sbVersion')).primaryKey]"
  }
}
Our objective is to read the output of the template, extract the NamespaceConnectionString from it and store it in an Azure Key Vault.
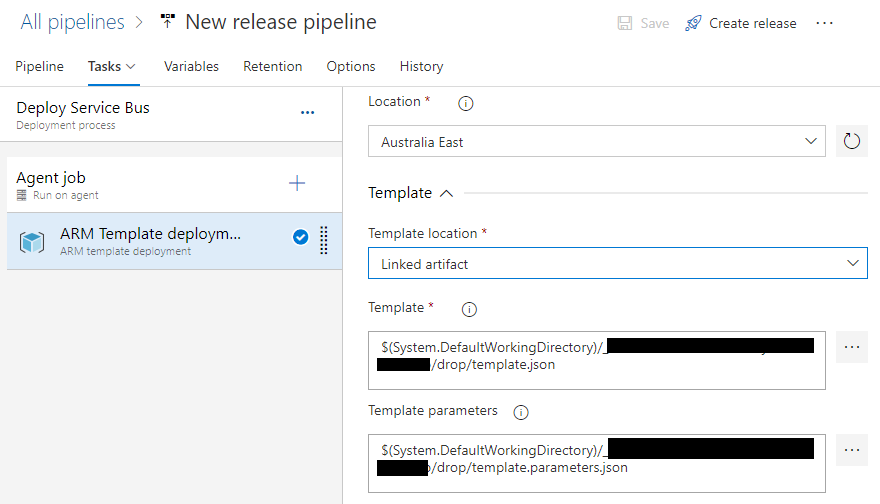
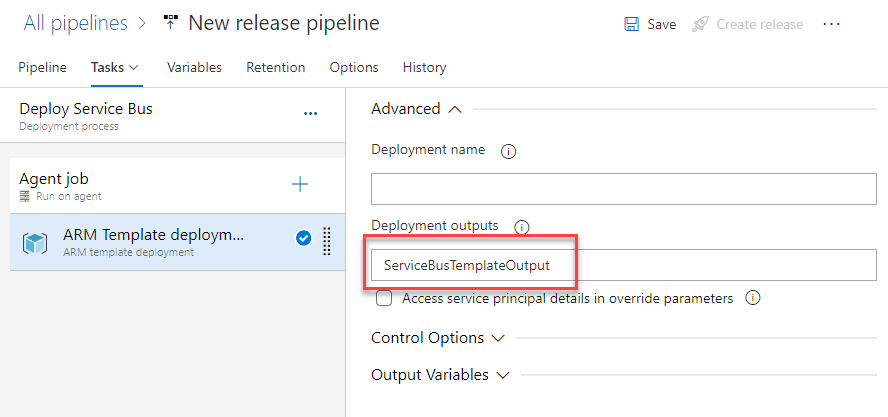
Step 1 – Store template output in a variable
Modify the ARM template deployment task to store the output of the template in a variable:
Step 2 – Parse the template output to extract connection information
Add a PowerShell task as shown below. It simply extracts the connection string from the template’s json output.
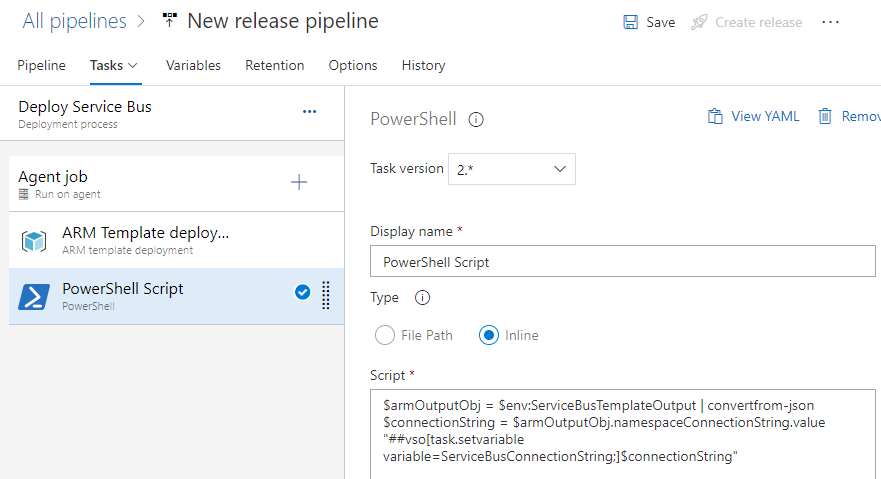
Here is the PowerShell script for the task above.
$armOutputObj = $env:ServiceBusTemplateOutput | convertfrom-json
$connectionString = $armOutputObj.namespaceConnectionString.value
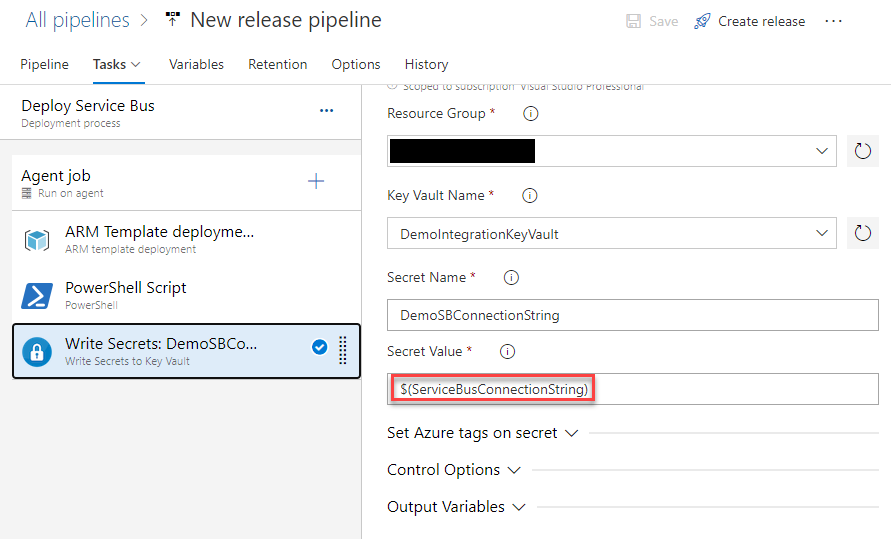
"##vso[task.setvariable variable=ServiceBusConnectionString;]$connectionStringStep 3 – Use “Write Secrets” task to store secrets in the Key Vault
Add a task to your release pipeline stage to write secrets to Azure Key Vault. It will look something like this (replace name of your Key Vault here). Note that the secret value is coming from the variable we set in Step 2 above.
 At this stage, if you have setup subscription information, Key Vault Name and other parameters correctly in the above task, and you run the pipeline, you will run into the following error:
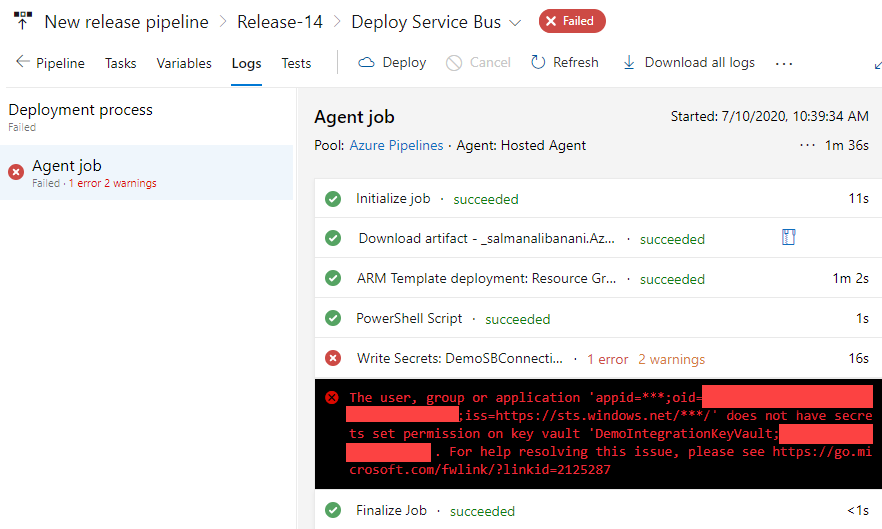 To fix that problem, we need to set permissions on Azure Key Vault. Continue with the following steps.
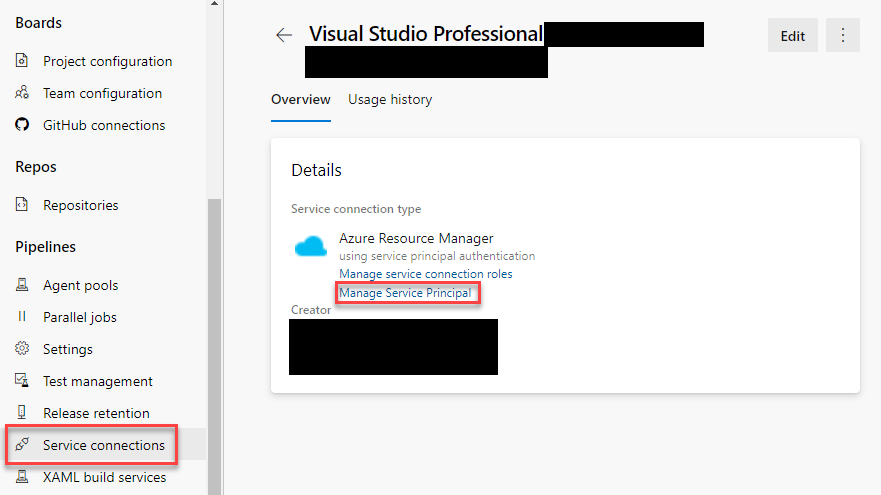
Step 4 – Find Managed Service Principal
In Azure DevOps, go to Project Settings => Service connections. Click on the “Manage Service Principal”.
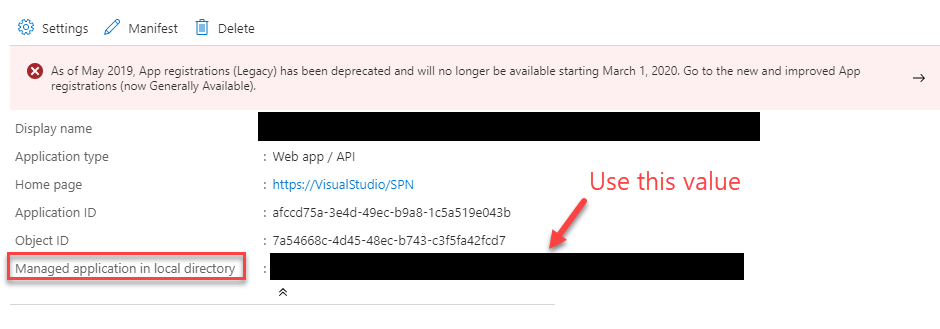
 This opens an Application Blade in a new tab. We are after the “Managed application in local directory” value as shown below. You may want to copy this to clipboard.
Step 5 – Modify Key Vault Access Policies
Head back to your Azure Portal and update Access Policies of the Key Vault as shown below.
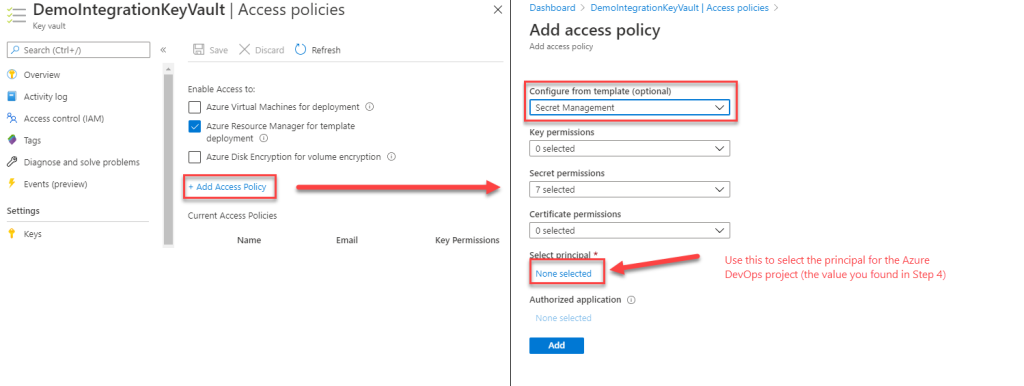 Set the access policy as shown above, and do not forget to hit the Save button on the “Access policies” blade.
At this stage, if you run the release pipeline again, you shouldn’t see the error that we encountered in Step 3 above.
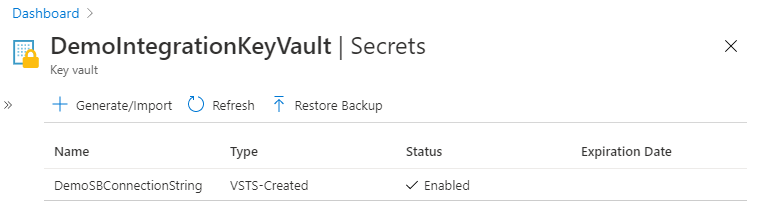
You can now go to the Key Vault and ensure that the new secret was created and verify the value stored. You can read this secret in subsequent stages of your pipeline.
Conslusion
In this post, we demonstrated how to store credentials to access an Azure resource in a Key Vault from a Release pipeline using the “Write Secrets” task.