Setting Key Vault Access Policy from Azure Pipelines
November 20, 2020
Azure Key Vault is a service that can be used to store application secrets, tokens, connection strings, certificates and API keys (amongst other things). The advantage of using Azure Key Vault to store all this information is that it provides a secured location with all usual safegaurds (encryption, access control and replication etc.)
If you create a Key Vault via an ARM (Azure Resource Manager) template in a YAML based pipeline, you will need to set access policies on that Key Vault, so that in later stages of the pipeline you can store secrets in it. You need an Azure AD (Active Directory) Service Principal that Azure DevOps uses to access your Azure resources. Below I will show how to do these steps.
The problem
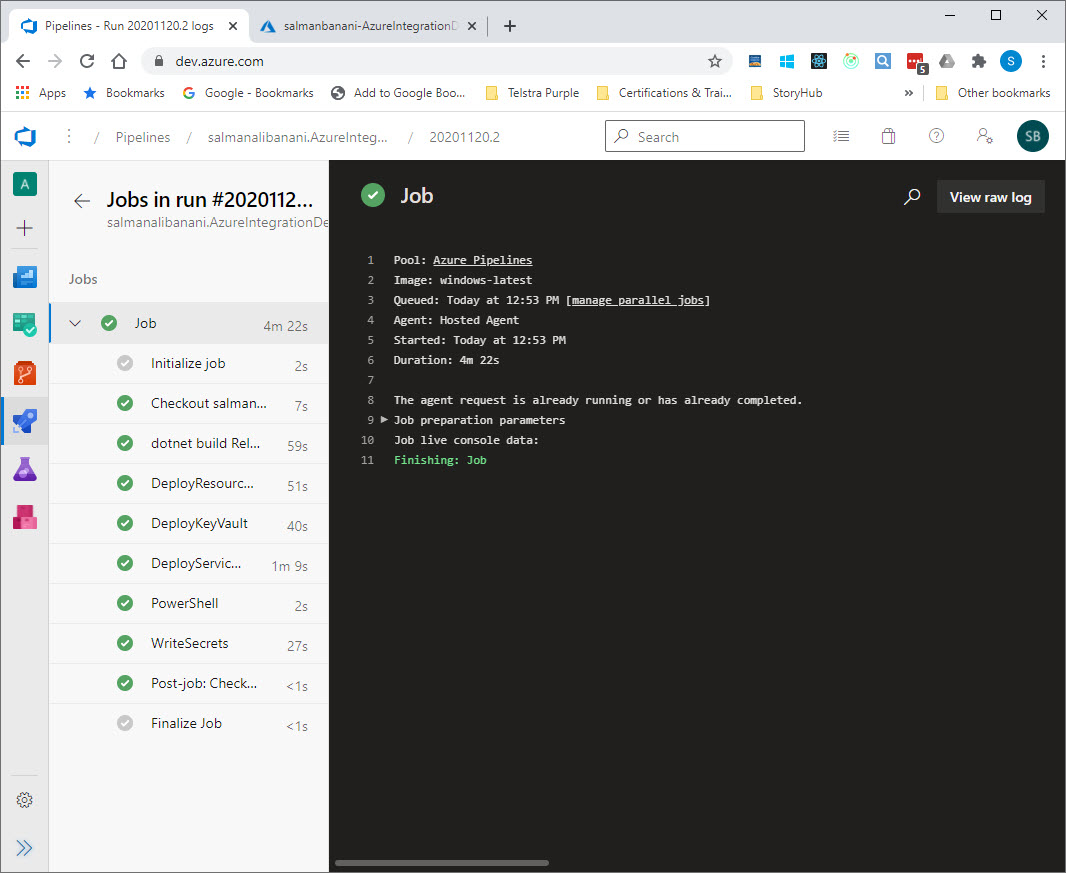
Here is an example run of Azure Pipelines where you can see a number of resources being provisioned. Our objective in this pipeline is to store the connection information for the Azure Service Bus in the Key Vault. The connection information for the Service Bus comes from the output of the ARM template that creates Service Bus. You can find this pipeline in the repository linked below.
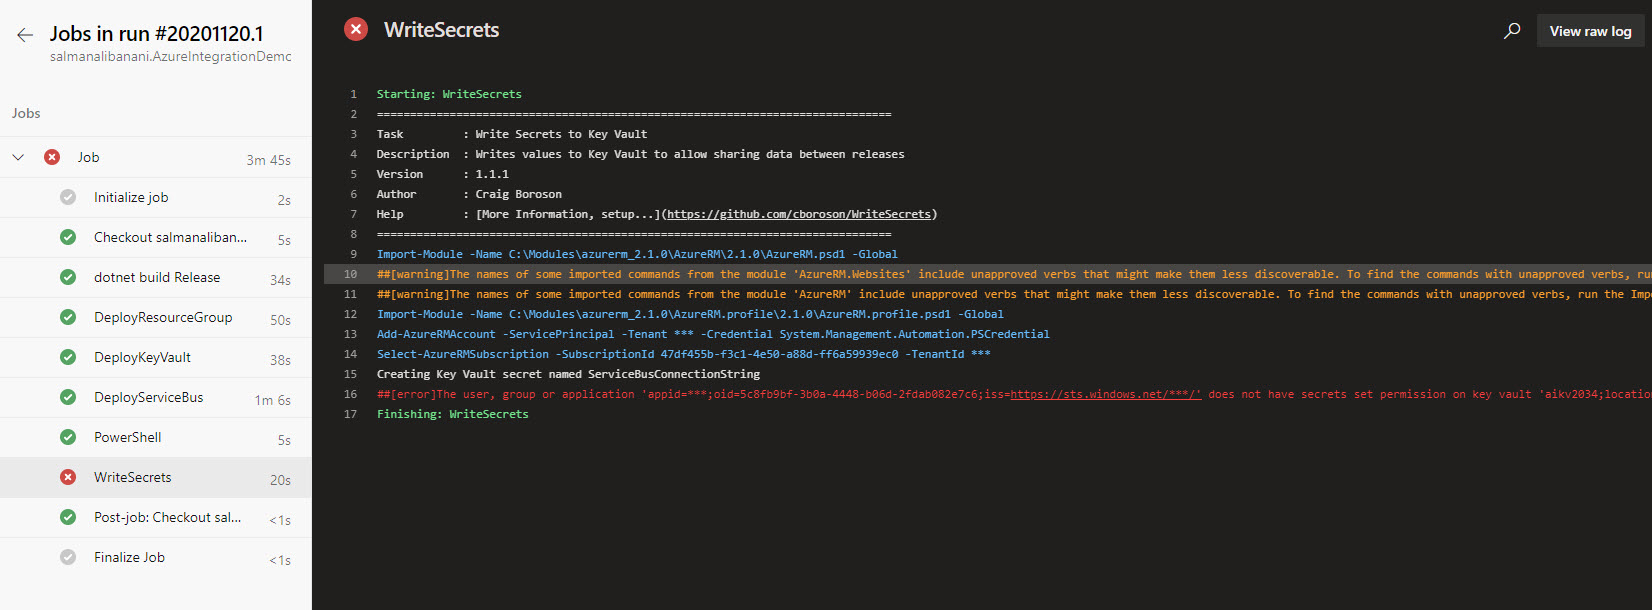
The problem here is that even though this particular Key Vault is created in the same pipeline, the later stages cannot write secrets to it because, as the error suggests, we don’t seem to have permissions to set secrets on that Key Vault.
As shown below in the snippet from the ARM template, we can set access policies if we can find out the objectId and tennantId. Note how we have set all permissions on “secrets”.
"resources": [
    {
        "type": "Microsoft.KeyVault/vaults",
        "apiVersion": "2019-09-01",
        "name": "[parameters('keyVaultName')]",
        "location": "[parameters('location')]",
        "properties": {
            "enabledForDeployment": "[parameters('enabledForDeployment')]",
            "enabledForDiskEncryption": "[parameters('enabledForDiskEncryption')]",
            "enabledForTemplateDeployment": "[parameters('enabledForTemplateDeployment')]",
            "tenantId": "[parameters('tenantId')]",
            "accessPolicies": [
                {
                    "objectId": "[parameters('objectId')]",
                    "tenantId": "[parameters('tenantId')]",
                    "permissions": {
                        "secrets": [ "all" ]
                    }
                }
            ],
            "sku": {
                "name": "[parameters('skuName')]",
                "family": "A"
            },
            "networkAcls": {
                "defaultAction": "Allow",
                "bypass": "AzureServices"
            }
        }
    }
]
Below are the steps to find out these ids.
Step 1 - Find Service Principal details for your Azure DevOps project
In your Azure DevOps projects where your Azure Pipelines pipeline resides, click on “Service connections” in Project Settings, and then click on “Manage Service Principal” link.
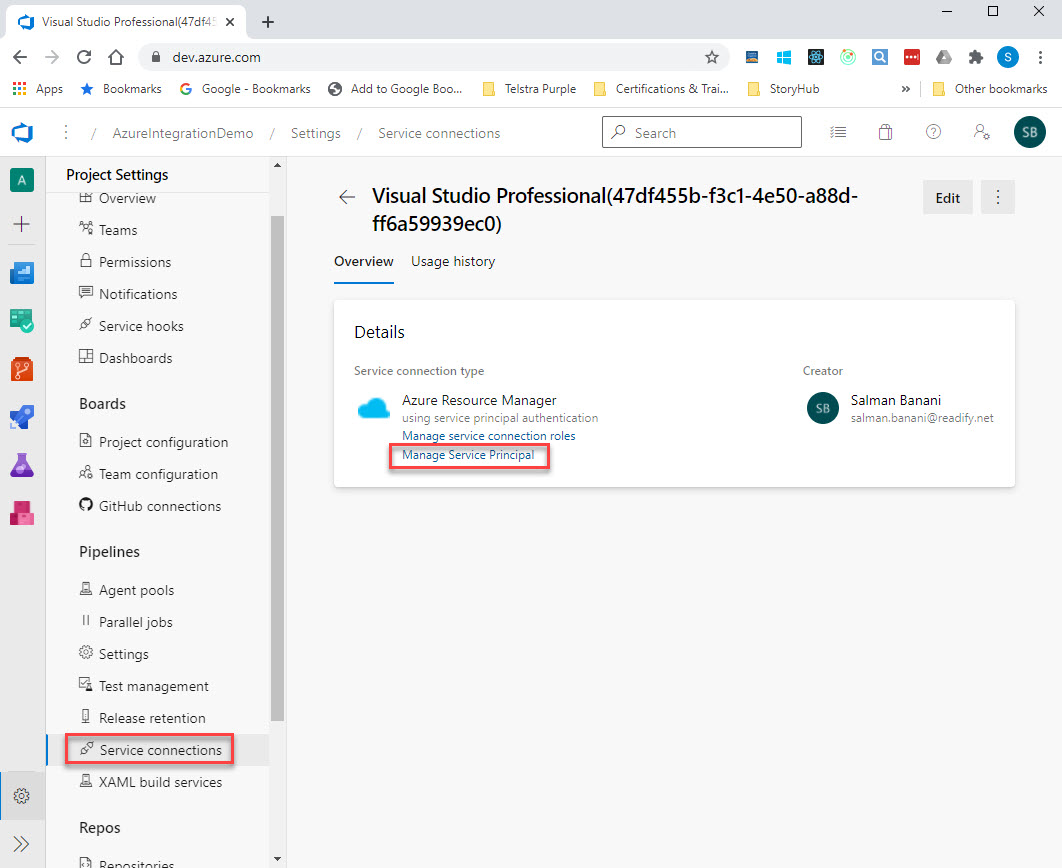
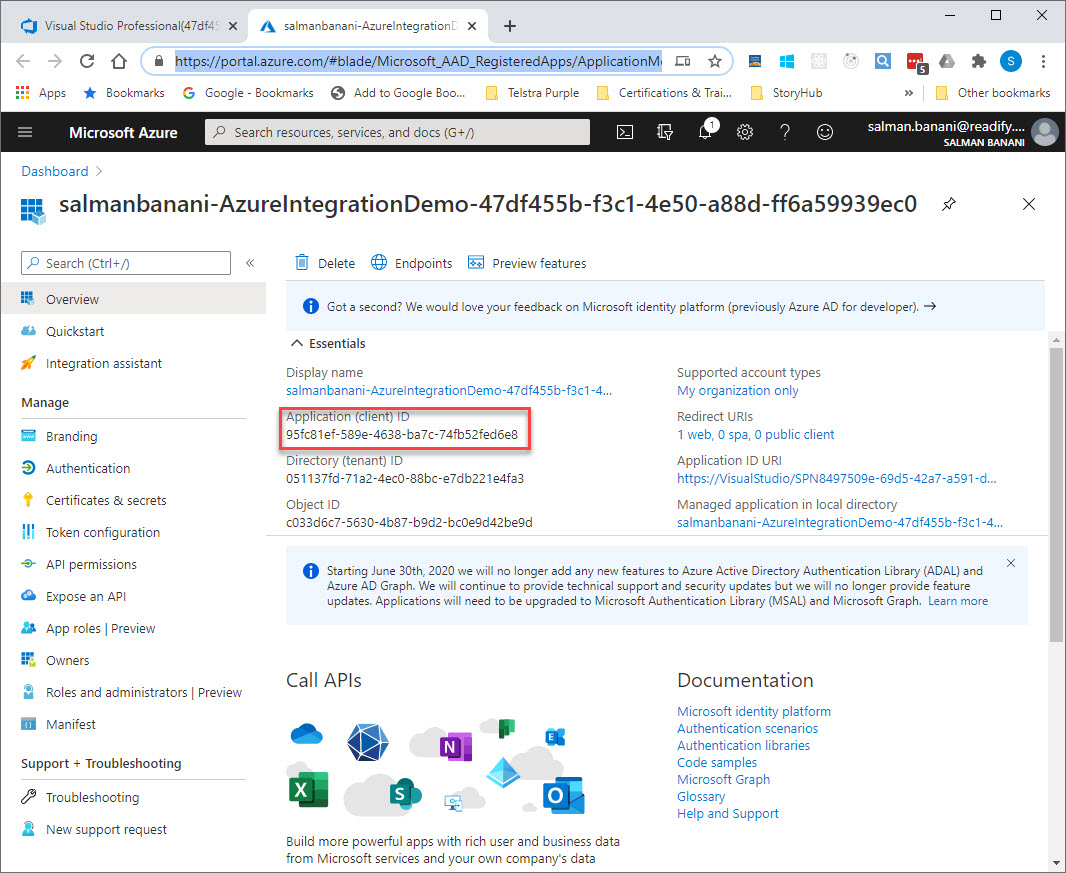
This takes you to a page where you can find applicationId for your Azure DevOps project.
Step 2 - Find Azure AD Service Principal
Our objective is to find the Azure AD Service Principal object id that we can use in our ARM template for the Key Vault.
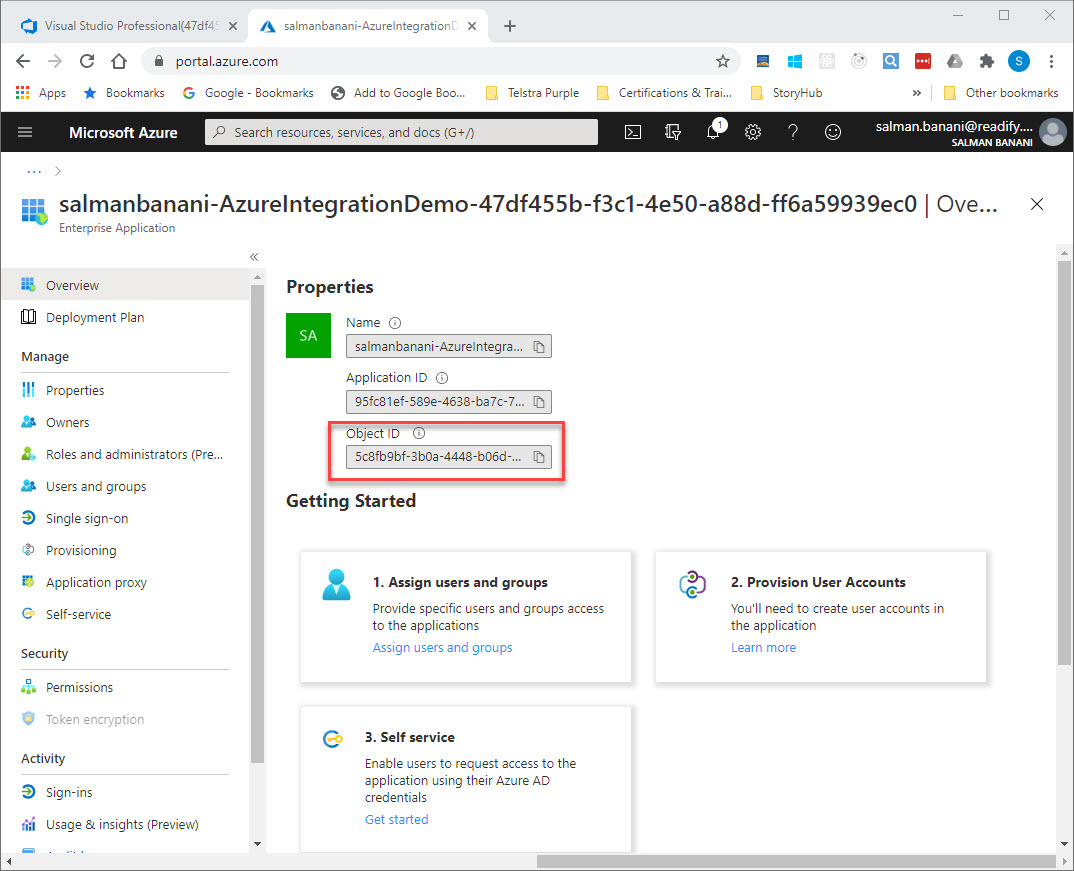
The easiest way to find this object id is to click on the “Managed application in local directory” link.
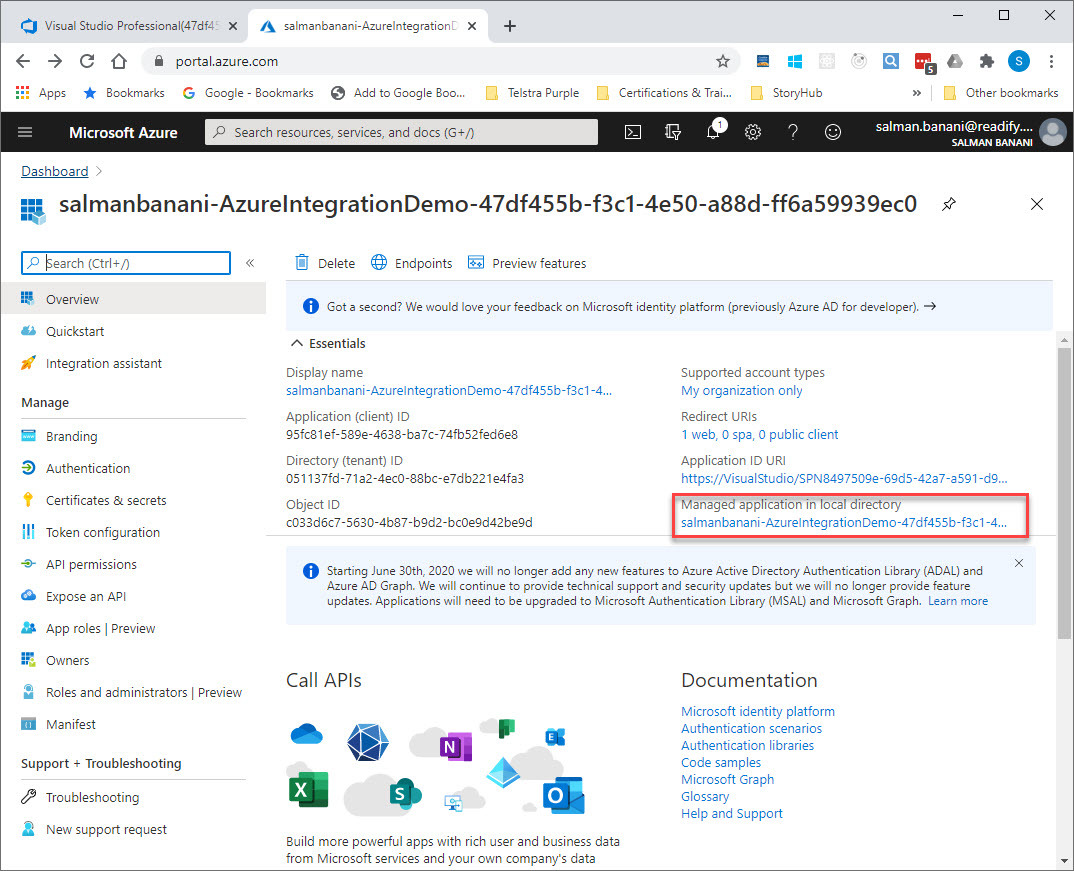
This takes you to a page where you can see the object id you need.
Another way to find this object id is by using a PowerShell script via Cloud Shell, and use the applicationId that we found in step 1. Open Cloud Shell in your Azure portal, and type the following:
Connect-AzureAD
Get-AzureADServicePrincipal -Filter "AppId eq '95fc81ef-589e-4638-ba7c-74fb52fed6e8'"
You can see the objectId in the result that you need.

Step 3 - Use the objectId in your ARM template parameters file
Now we have all the information that we need to pass as parameters to our ARM template. Here is our parameters.json file for the template.
{
    "$schema": "https://schema.management.azure.com/schemas/2019-04-01/deploymentParameters.json#",
    "contentVersion": "1.0.0.0",
    "parameters": {
        "keyVaultName": {
            "value": "aikv2034"
        },
        "tenantId": {
            "value": "051137fd-71a2-4ec0-88bc-e7db221e4fa3"
        },
        "objectId": {
            "value": "5c8fb9bf-3b0a-4448-b06d-2fdab082e7c6"
        }
    }
}
The tenantId comes from the screenshot in Step 1 above, and objectId is the id that we found in step 2.
Now if you run the pipeline again, you will see that the “WriteSecrets” step is successful, and the connection string for the Service Bus is being saved successfully.
How “WriteSecrets” step works
There are a few details in our pipeline .yml file that you may want to have a closer look.
- task: AzureResourceManagerTemplateDeployment@3
  name: DeployServiceBus
  inputs:
    deploymentScope: 'Resource Group'
    azureResourceManagerConnection: 'Visual Studio Professional(47df455b-f3c1-4e50-a88d-ff6a59939ec0)'
    subscriptionId: '47df455b-f3c1-4e50-a88d-ff6a59939ec0'
    action: 'Create Or Update Resource Group'
    resourceGroupName: 'AzureIntegrationDemoRG'
    location: 'Australia East'
    templateLocation: 'Linked artifact'
    csmFile: '$(System.DefaultWorkingDirectory)/Templates/ServiceBus/template.json'
    csmParametersFile: '$(System.DefaultWorkingDirectory)/Templates/ServiceBus/template.parameters.json'
    deploymentMode: 'Incremental'
    deploymentOutputs: servicebustemplateoutput
- pwsh: |
    $armOutputObj = '$(servicebustemplateoutput)' | convertfrom-json
    $connectionString = $armOutputObj.namespaceConnectionString.value
    Write-Output "##vso[task.setvariable variable=ServiceBusConnectionString;issecret=true]$connectionString"
- task: cboroson-WriteSecrets@1
  displayName: WriteSecrets
  inputs:
    ConnectedServiceName: 'Visual Studio Professional(47df455b-f3c1-4e50-a88d-ff6a59939ec0)'
    resourceGroupName: 'AzureIntegrationDemoRG'
    KeyVaultName: 'aikv2034'
    SecretName: 'ServiceBusConnectionString'
    SecretValue: '$(ServiceBusConnectionString)'
First, notice the “deploymentOutputs” part in the “DeployServiceBus” task. This creates a pipeline variable “servicebustemplateoutput” that contains the output of the ARM template that creates the Service Bus. We refer to this variable in the next step where we run a custom PowerShell script to parse the connection string out of the json output of the template, and put it in another pipeline variable “ServiceBusConnectionString”. Also note that we use the “issecret=true” property to make sure that the variable is masked out from the logs.
The last bit of the .yml file uses a task to write this connection string as a secret to the Key Vault.
Conclusion
In this post, we demonstrated how to store credentials to access an Azure resource (Service Bus) in a Key Vault from an Azure Pipeline. Generally you keep your Azure resources within a single ARM template if possible, which makes things a lot simpler. The techniques demonstrated in this post are useful when you need to split your resources using multiple ARM templates. The important step was to find the Service Principal information that we needed to add to our ARM template that provisioned the Key Vault, so that in the later stages of our pipeline, we can write to the Key Vault.
The source code is available here